


–Intro–
Paco Motorsports purchased a new 2017 Miata RF as a development car, and immediately began designing aftermarket products for it. While we are mostly known for offering suspension, chassis stiffening, and other performance driving products, we also have experience developing higher-end audio systems. The owner Mark Rivera has been a self-proclaimed “budget audiophile” for over 20 years. A musician himself, Mark enjoys hearing ALL the music in his vehicles, and this frequently commuted Miata is no exception. Here’s his long-winded, hopefully informative journey through upgrading the factory BOSE setup in this Miata.
–The Scope–
The purpose behind this project is to improve the sound quality of the factory BOSE system through controlled measurements, testing, and careful modifications to the factory bits, while developing and producing related products for sale. I don’t pretend to carry a PhD in audio science, nor do I relate well to the many pretentious “audiophile” types who spend unimaginable dollars chasing very diminished returns in sound quality. My goal is to find the sweet spot of high quality audio improvements over the factory system, utilizing components that are known for offering a lot of “bang for the buck”. Over the years I’ve come up with some very nice systems that produce very satisfying audio without breaking the bank too much.
–The Test Setup–
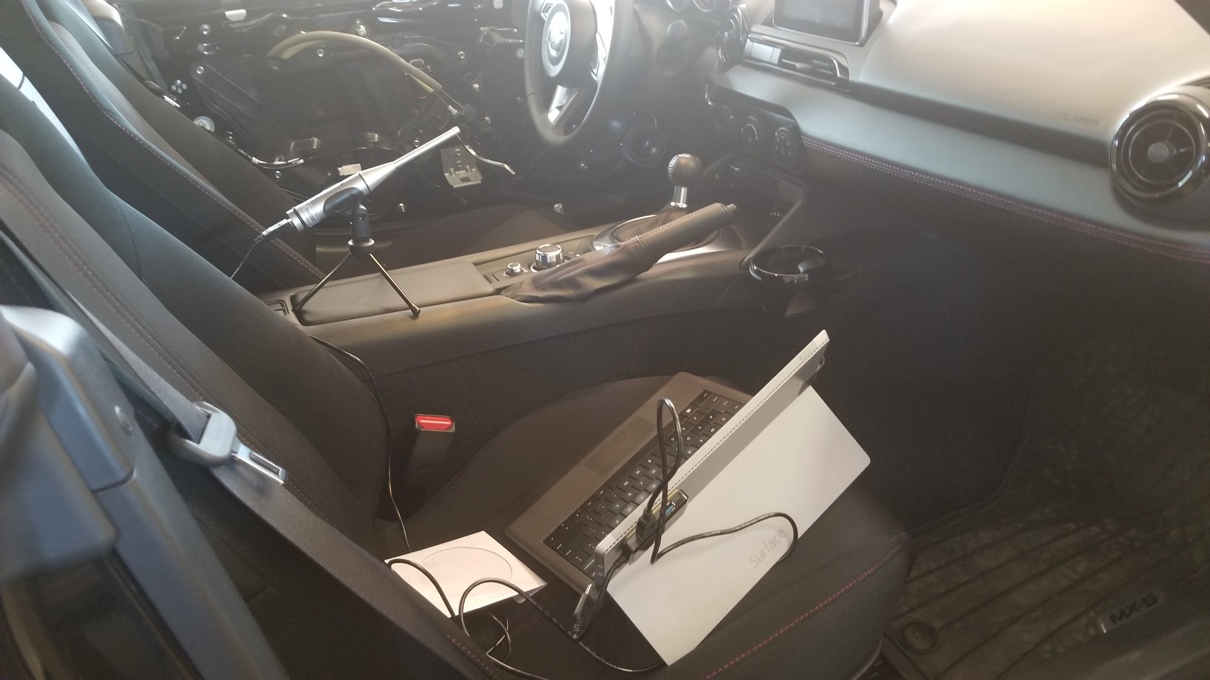
All measurements were taken with a Dayton OmniMic V2 setup, inside the car with the top and windows up. Volume set to level 30, bass and treble settings centered, and the fader set 3 clicks forward, to help separate the sound stage from the head rest speakers. For the most part, I don’t plan on replacing or modifying the head rest speakers at all. They work fine for hands-free calling and I don’t like hearing much more than low bass coming from behind me anyway. I will give BOSE credit for EQ’ing the higher frequencies out of the headrest speakers. The test microphone sits back on the center console on a small tripod, aimed forward and centered. The test is a simple frequency response sweep played through the Miata’s CD player. All frequency response curves will be displayed with the baseline BOSE system in black, and the particular mod shown in blue for comparison.
–The BOSE Factor–
You can find countless varied opinions on BOSE products in general, but I’ll try to quickly summarize my own thoughts about them. BOSE is an extremely popular and successful brand, but they get a bad rap from the more discerning listener, and mostly for good reason. BOSE is very good at digital signal processing, marketing, and making smaller, lower-end speakers and enclosures sound “good” to most people. They use some unconventional trickery here and there to make their systems sound larger than what they really are, which can make the music sound very unnatural at times. For the general population, BOSE systems are impressive and plenty adequate as an upgrade over the base model audio system available on most vehicles. On my 2017 RF, I have to say this is one of the better BOSE systems I’ve heard in a vehicle, ESPECIALLY considering the diminutive size and space constraints of the Miata. Just as “there is no replacement for displacement” when it comes to engine power, however, there is still not much that can beat larger enclosure loudspeakers, and heavy, robust amplifiers. Conversely, just as power density improves with gasoline engines every day, technological advances in digital amplifiers and small speakers that can play very low frequencies improves all the time as well. Bottom line, there’s plenty of room for improvement here.

–The System Rundown–
The BOSE system is comprised as such:
– The head unit, or digital tuner/Bluetooth/CD system that creates the audio signals from the selected source
-The BOSE amplifier, which boosts those signals for play through the system speakers. The amplifier is also where BOSE does their signal modifications and “shaping” of the sound, which makes the cheap, low-end speakers shine above their limited abilities.
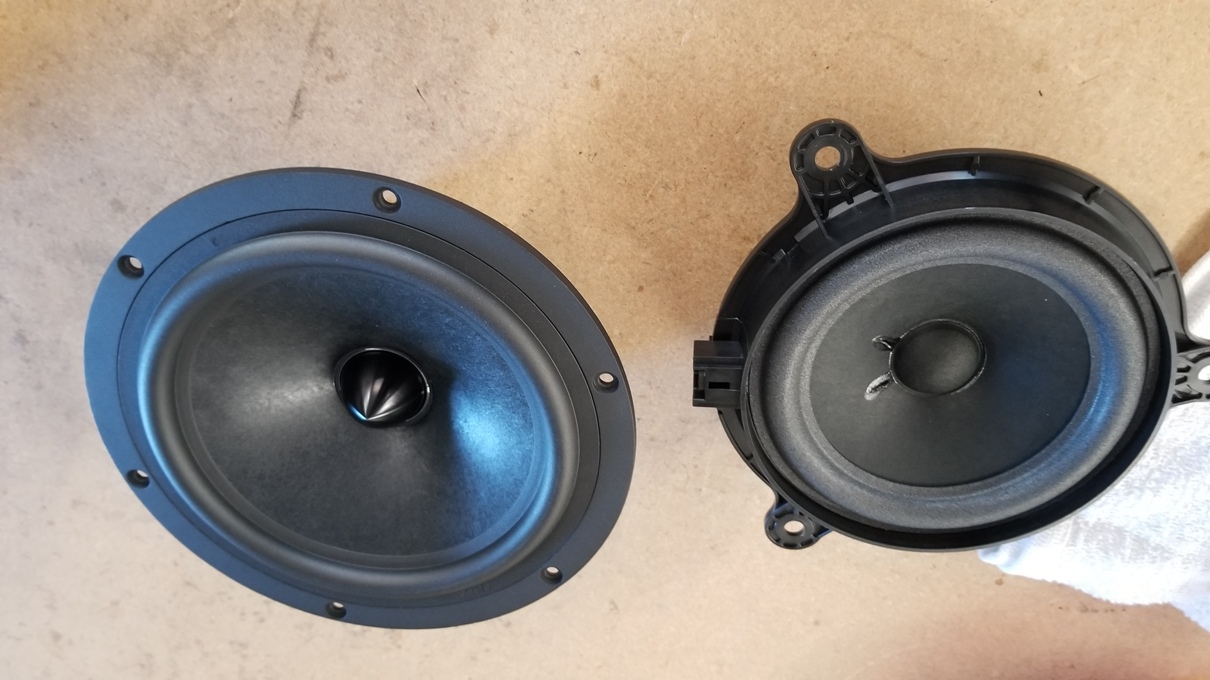
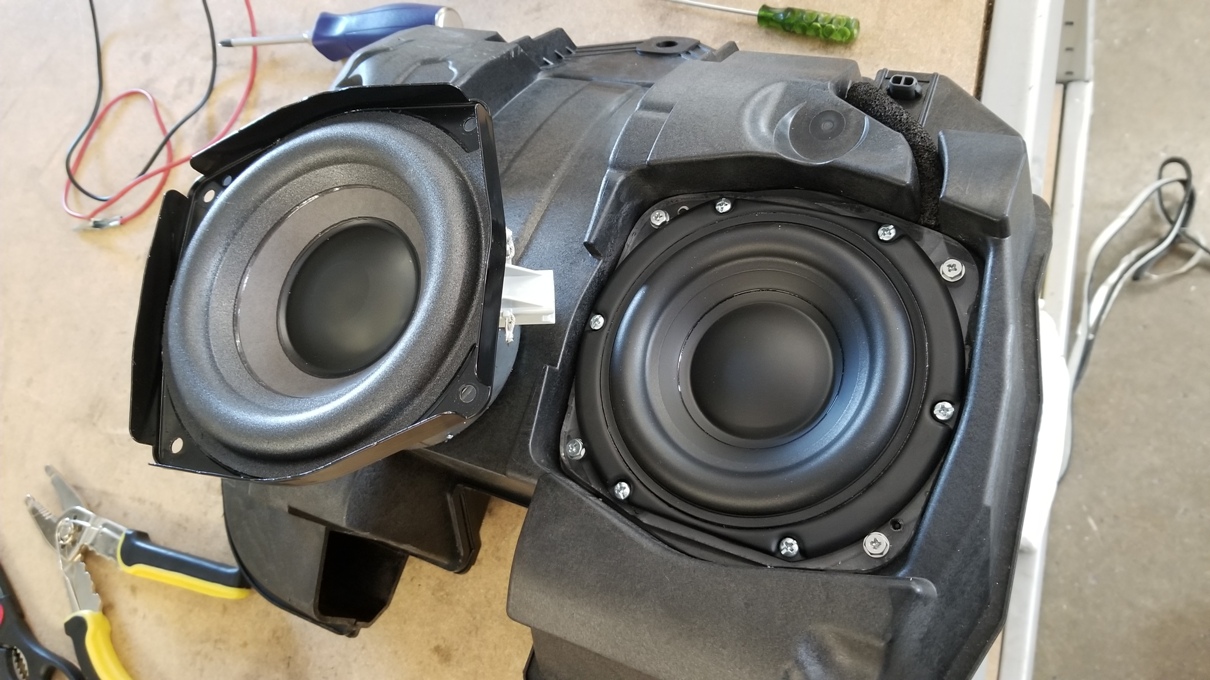
-The door speakers: One speaker per door, which plays the midrange and mid-bass frequencies. 2ohm impedance with the BOSE system, 4 ohms with the standard setup
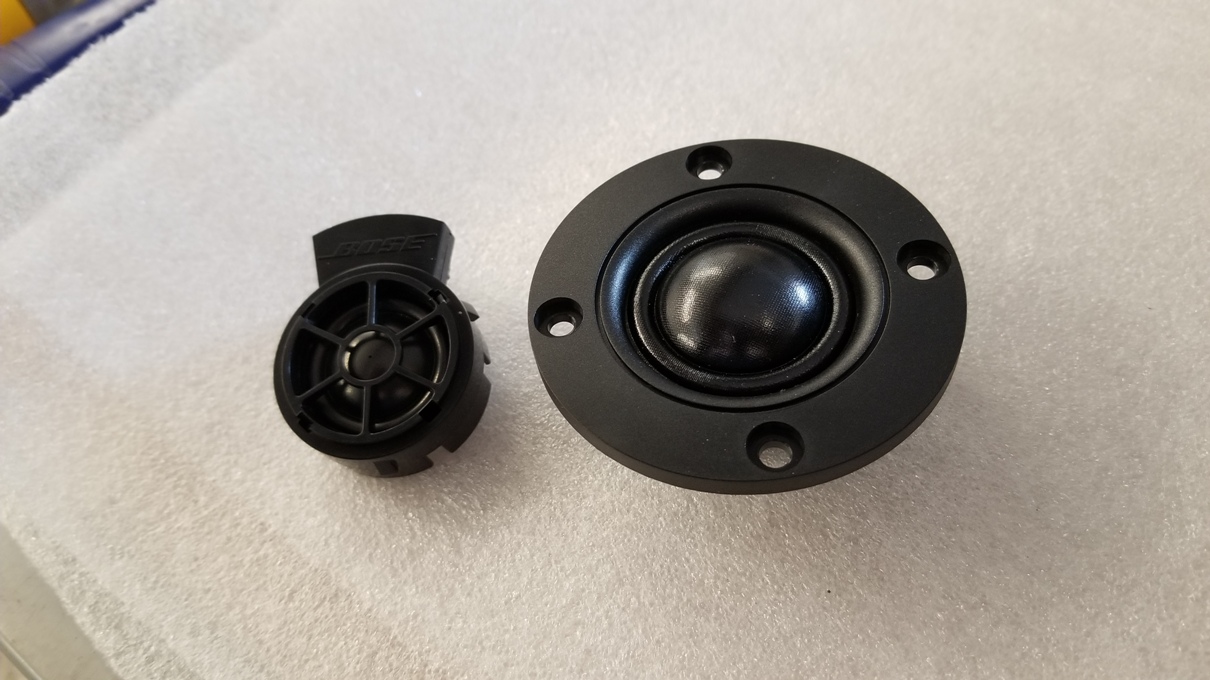
-The A-pillar tweeters: One tweeter per pillar, 4 ohm impedance, wired in parallel with the door speakers and first order capacitor filter in series.
-The headrest speakers: two 4 ohm speakers per headrest. BOSE limits these speakers to the lower-mid frequencies only, which is only good for a little rear fill. For all our testing we have these tuned out somewhat by ALWAYS setting the fader 3 notches toward the front. This is to help keep the “soundstage” up in front where it belongs and sounds most natural. Honestly, I would remove/disconnect these altogether, except they work REALLY well for Bluetooth handsfree calls, especially with the top down.
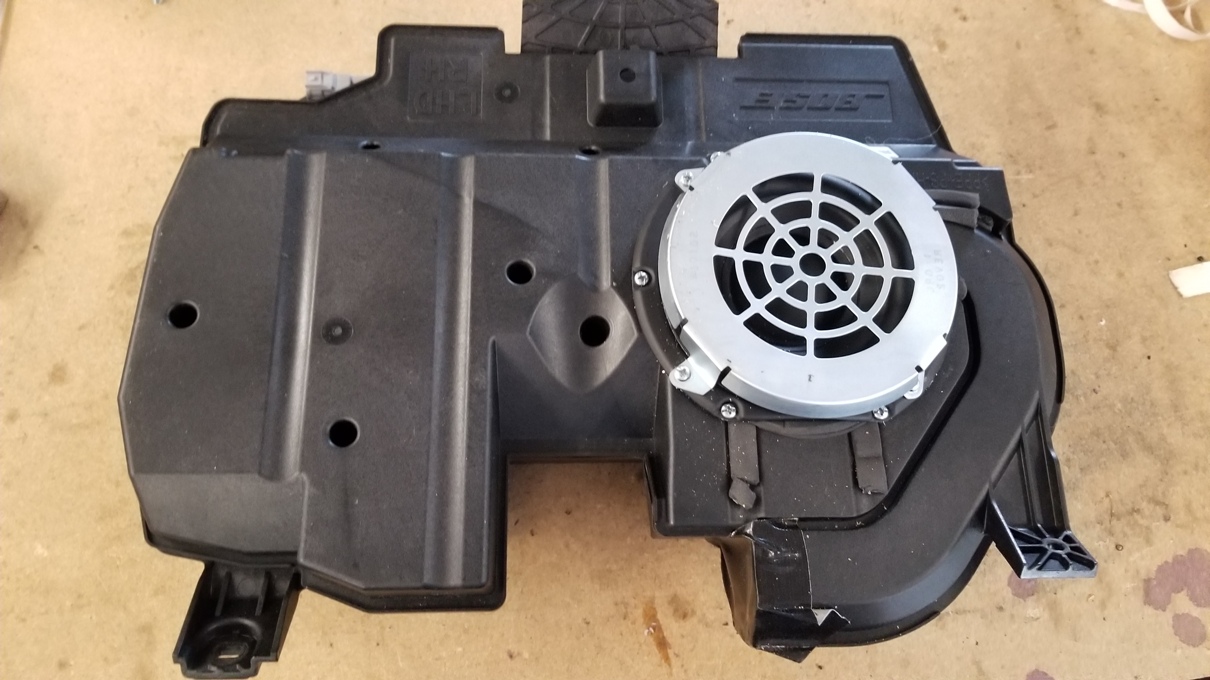
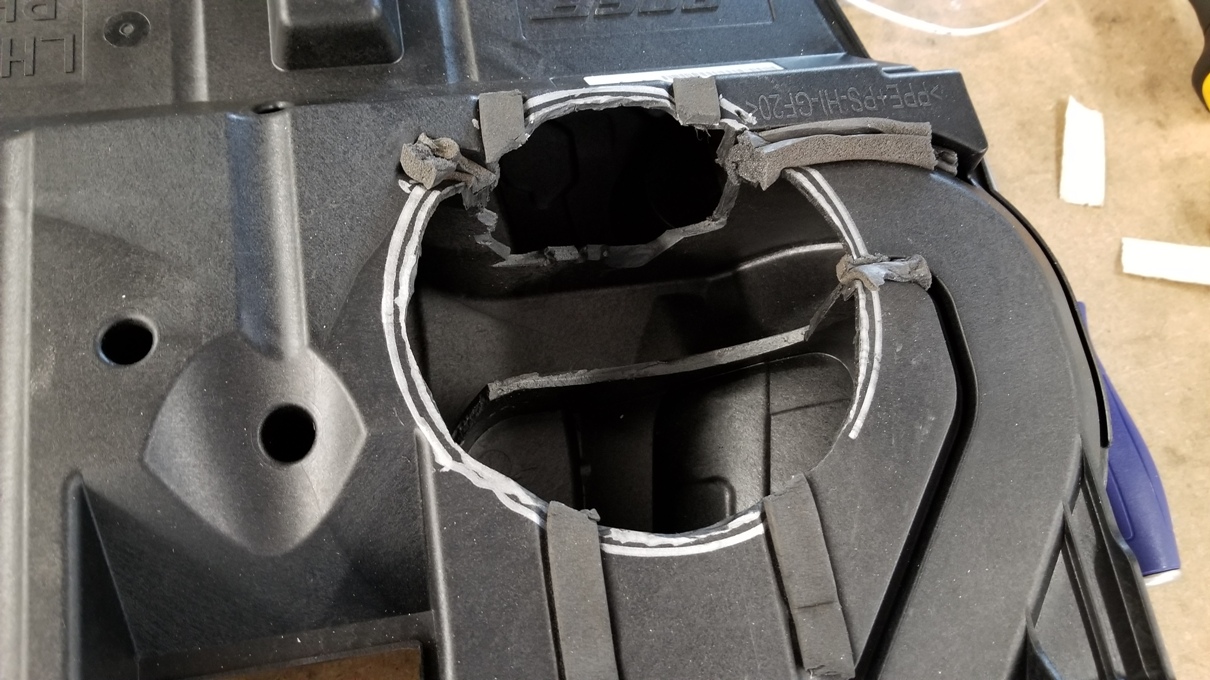
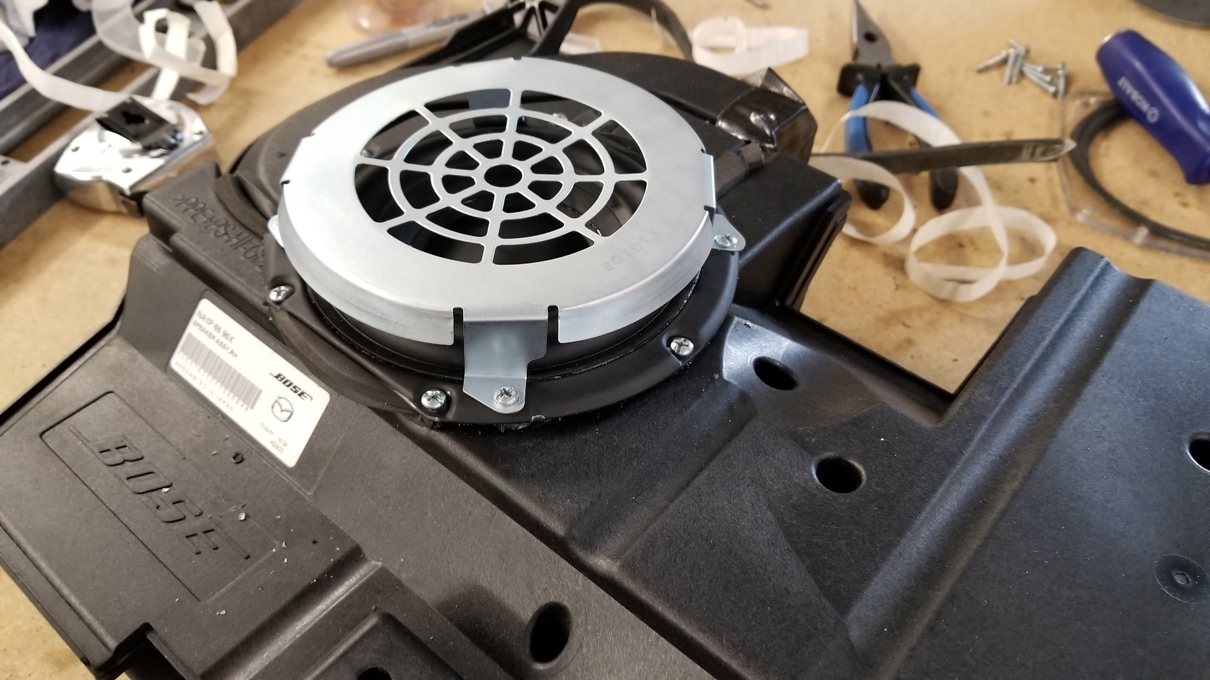
-The footwell subwoofer: Exclusive to the BOSE audio system, there is a passenger footwell subwoofer fitted. It includes a 5.25″ driver in a vented or “ported” enclosure, injection molded from glass reinforced plastic. The enclosure is tuned to somewhere around 45Hz and creates a decent amount of bass for such a compact design. The downside to the small, vented design is that BOSE really wanted to get every last ounce of bass from this setup, and unfortunately this makes the low end somewhat boomy and muddy.
–The Plan-
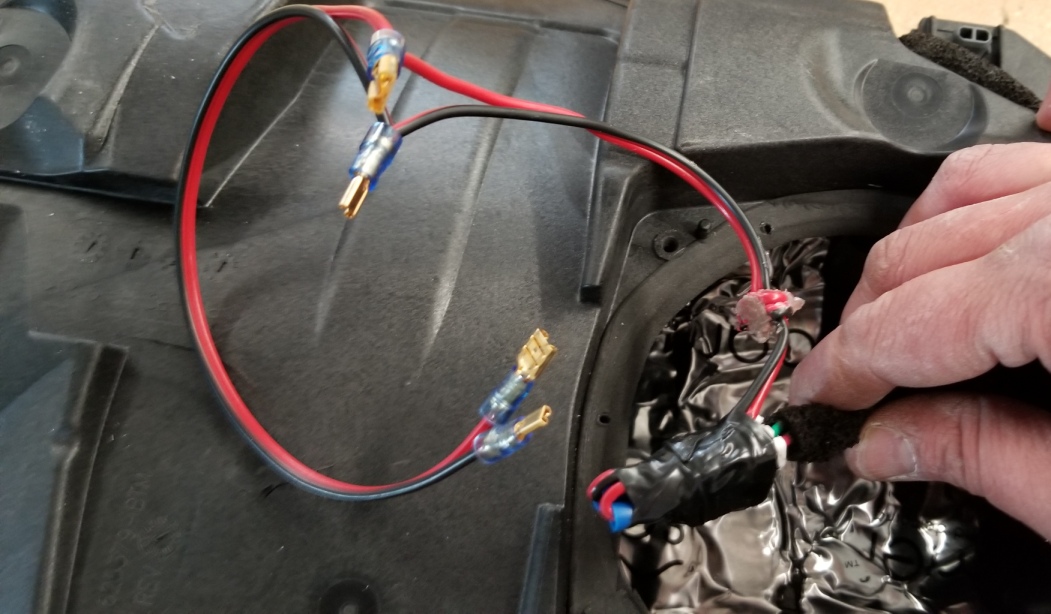
First, I wanted to replace the door speakers and tweeters with higher quality units, and finely tune those mods to get the flattest frequency response curve that sounded clear and natural, without touching the factory amplifier or making any obvious modifications to the doors or A pillars. The biggest challenge here is combining components that match the impedance of the BOSE speakers, within the space available. Most car audio amps are built for 2-4 ohm loads. The BOSE system is running at 1.33 ohms per front channel (doors and tweets), and 1 ohm for the sub. Some owners have simply replaced the doors and tweets with any number of aftermarket components sets. You can improve the sound quality by doing this, but you lose output from the amplifier with the 4 ohm impedance. I was not ok with this compromise, as I want to extract every available (clean) watt from the system.
Door speakers replacement – Take 1
Since I wanted to match the 2 ohm impedance of the factory BOSE mid-woofer, I initially decided to fit three speakers per door. I picked a Dayton RS150-4, which is a 6” 4 ohm mid-woofer to replace the BOSE mid in the door, then two 2″ full range Foundtek FR58EX 8 ohm speakers mounted on either side of the mid. With all wired in parallel the resultant impedance was 2 ohms as desired. I made some small Lexan baffles for the 2″ drivers and epoxied them to the back of the door panels. This setup gave a lot more clarity in the audio, but was a bit too “honky” for my tastes. A bit too peaky in one part of the midrange. Note, I did not call YOU a honky, only the midrange sound quality. Relax.
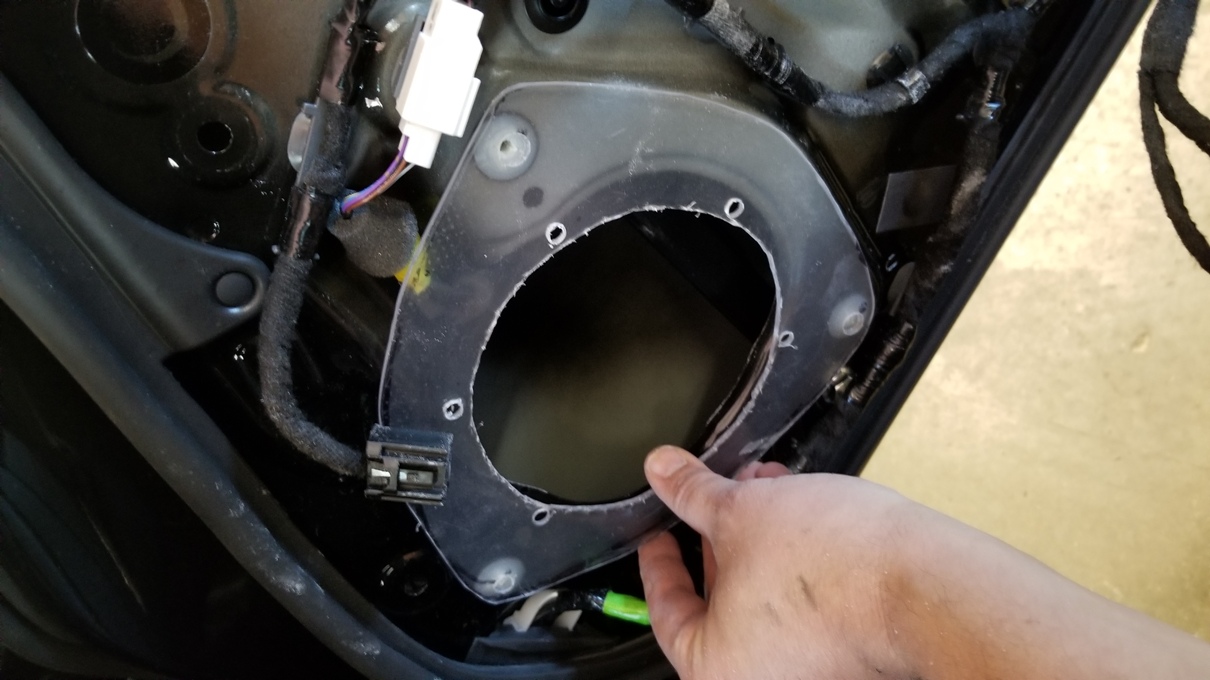
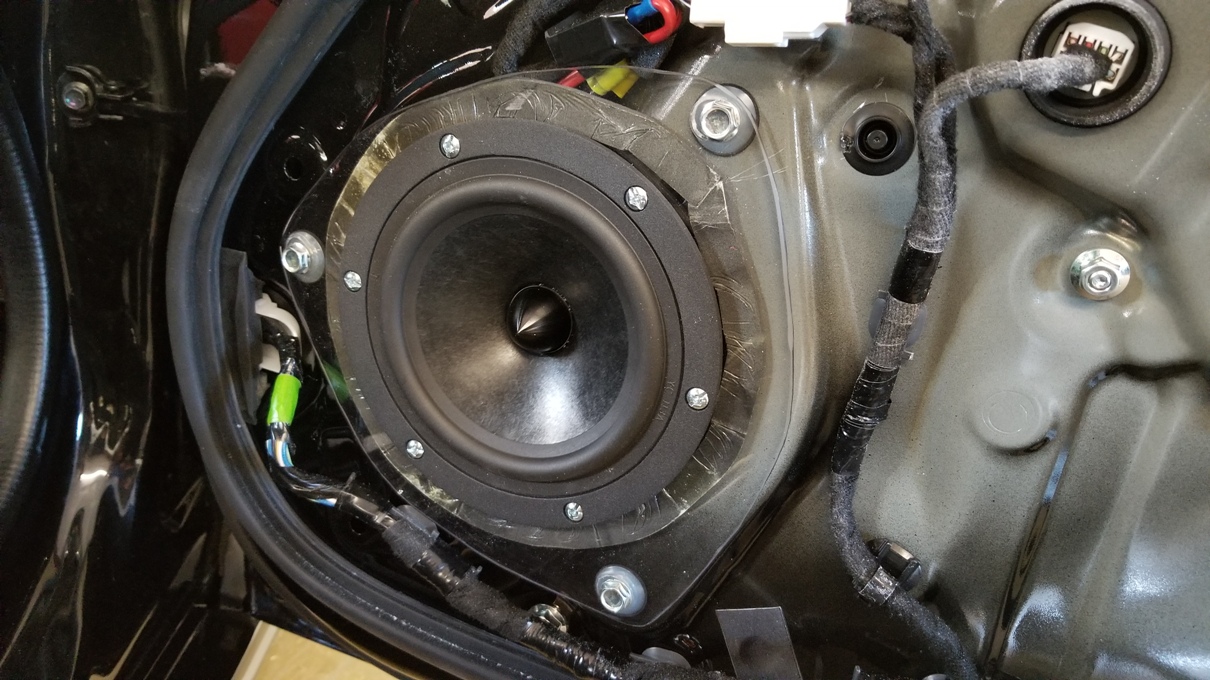
Door speakers replacement – Take 2
Still hoping to match the BOSE impedance of the door speakers, I scrapped the first design and decided to use two 4 ohm drivers in parallel to get the 2 ohms. I used the same 6″ woofer from the last step, but this time paired it with a 3.5″ Dayton ND-91, a 4 ohm, full range driver that extends into the lower range very well for a driver its size. I made some more adapter plates from 1/4″ Lexan to screw into the factory location in the door. This setup barely fit in to the door sheet metal, even after some extensive trimming. These drivers smoothed out the response a bit, but still left the midrange sounding too strong in spots, and weak in others. Fun to try, but definitely not the right solution just yet. I went back to fitting the factory door speakers for the moment.

–Tweeter Replacement–
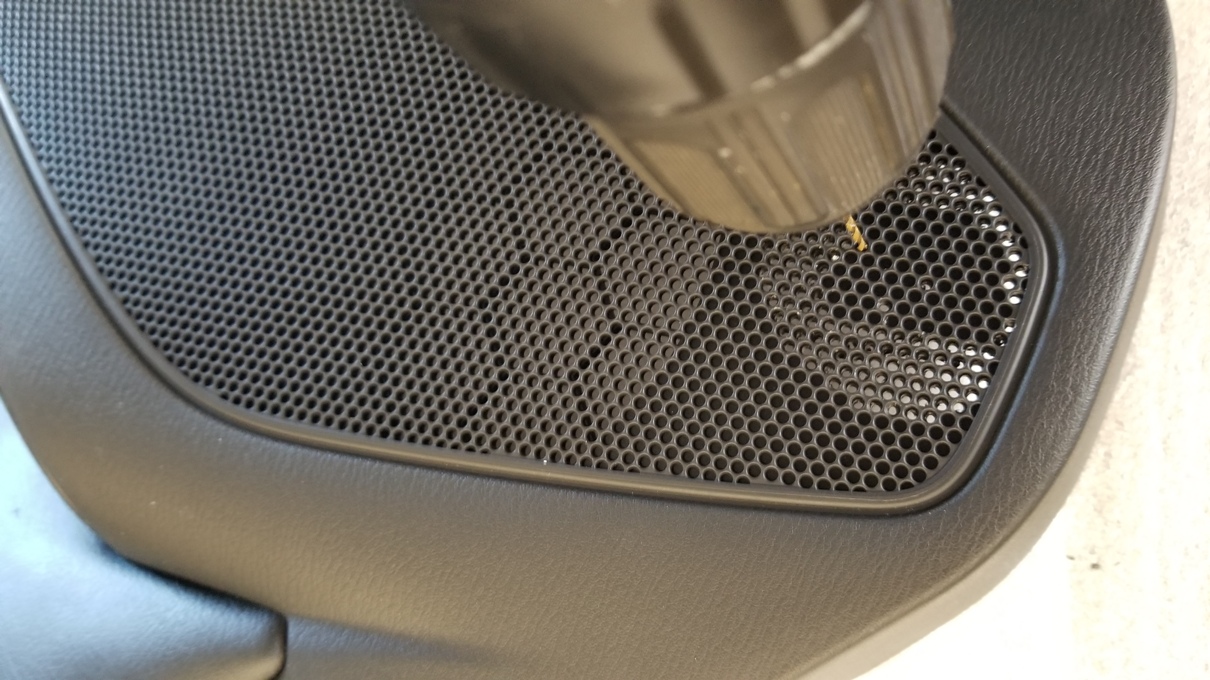
On to the A-pillar tweeters… I was able to dial in a nice replacement for the factory tweeters, without much fuss. I used Dayton’s ND-16FA-6, a 5/8” silk dome tweeter with really smooth response. This was such a nice improvement to the overall sound. You can hear so much more detail in the music, and once I picked in the right capacitor filter and L-Pad circuit components, the balance was perfect and never sounded harsh or tinny like the factory units. Successful tweeter replacement! We will be offering these and their filter/L-pad circuits along with the final door speaker setup and all installation materials as a complete replacement package.
–The Footwell Subwoofer–
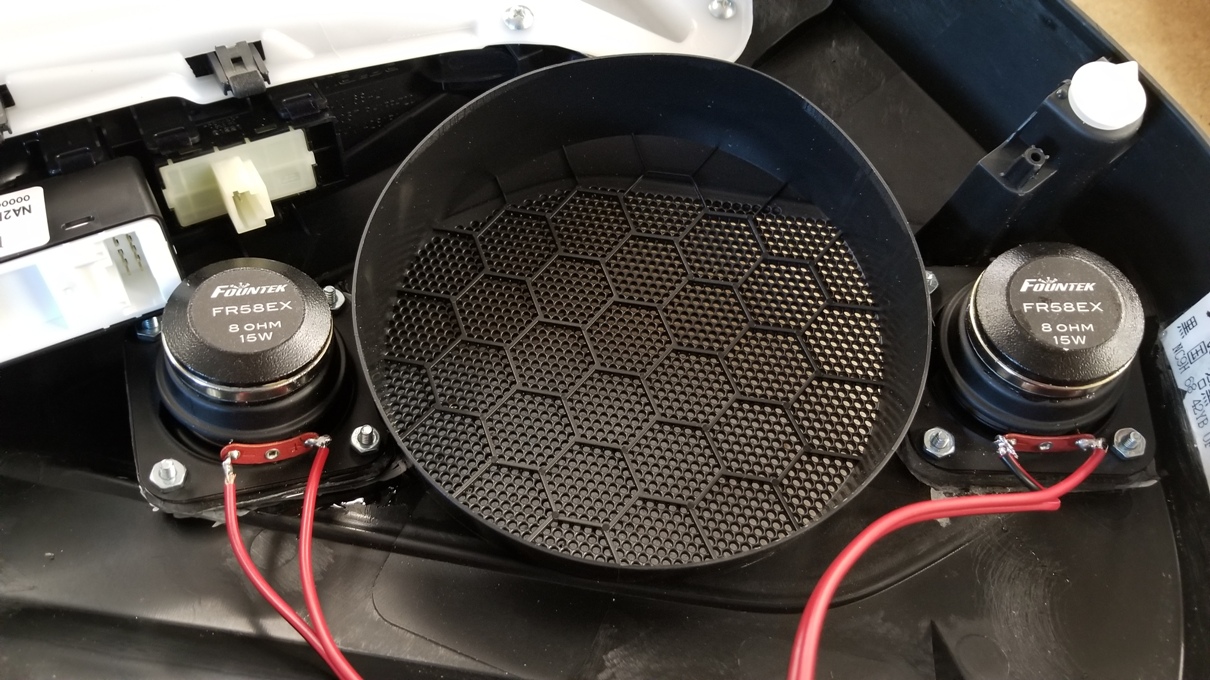
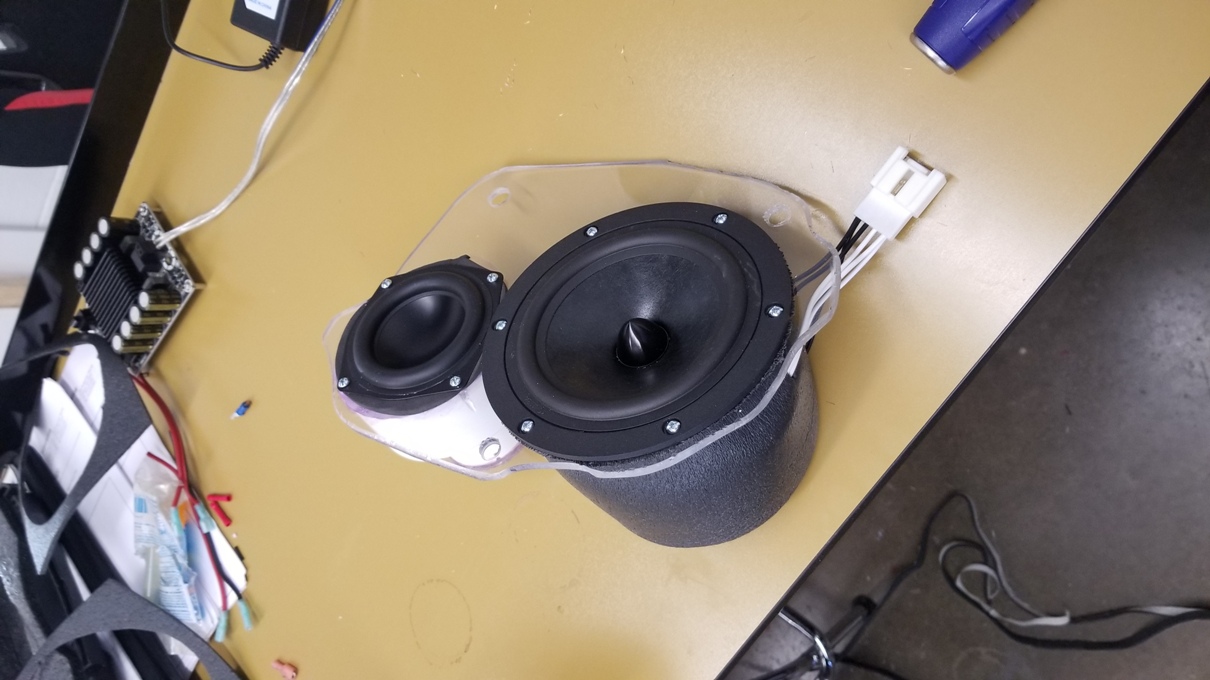
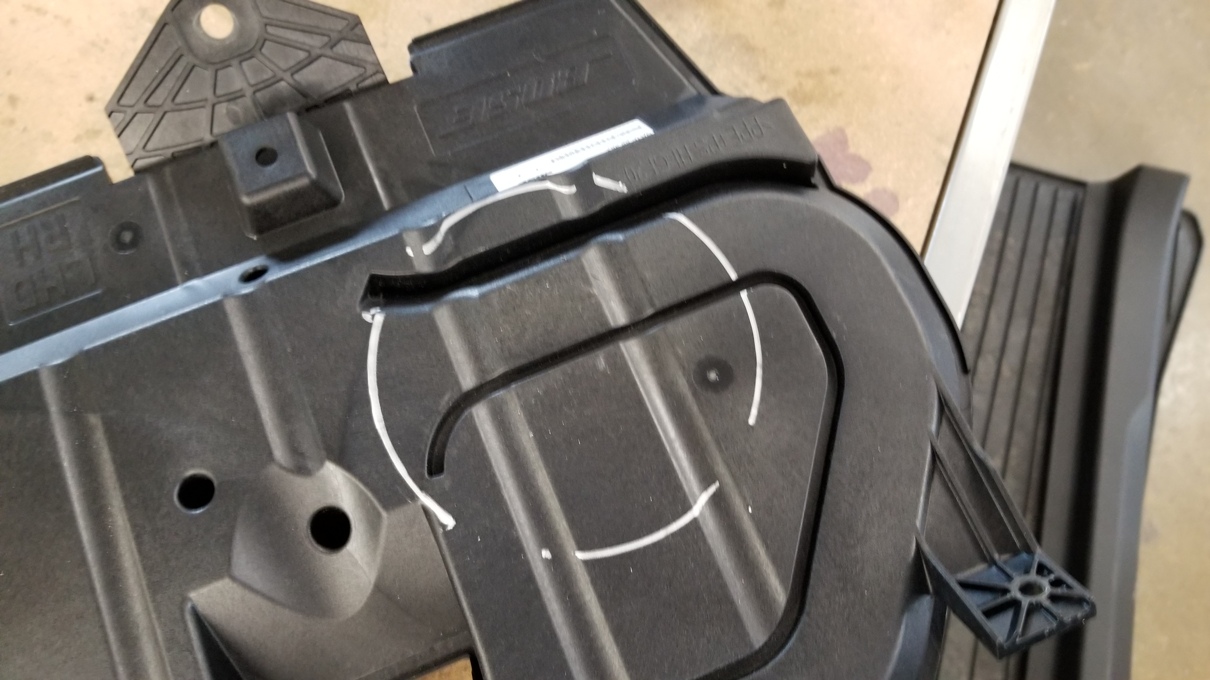
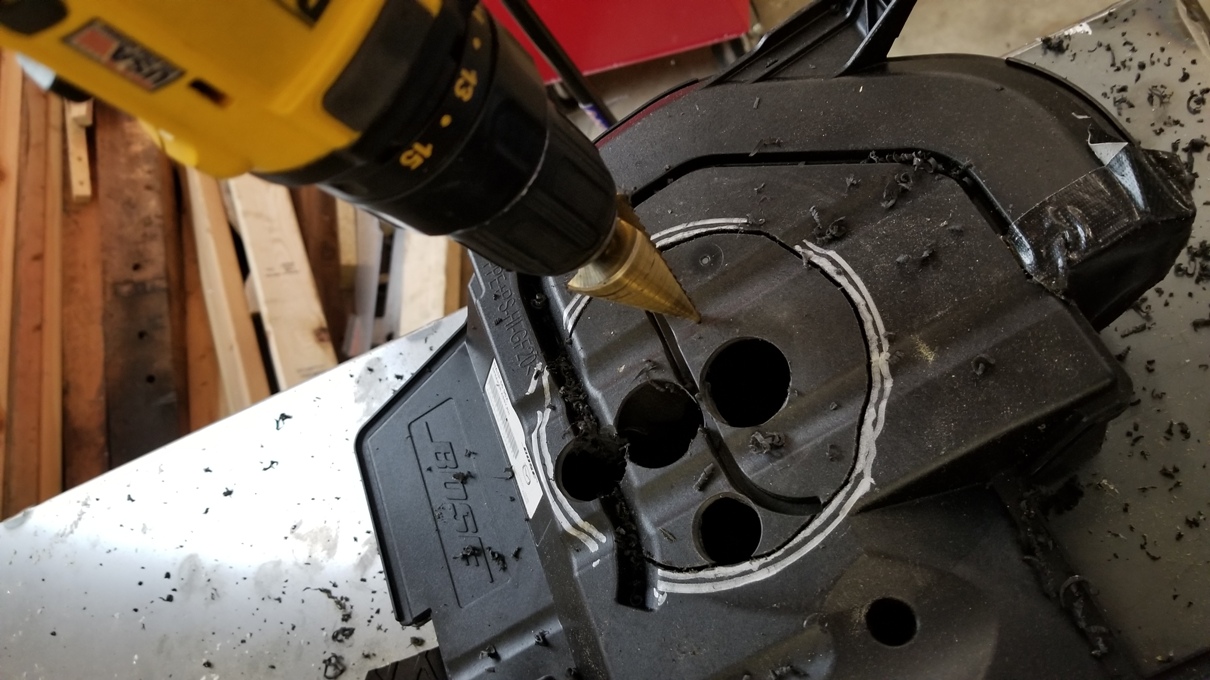
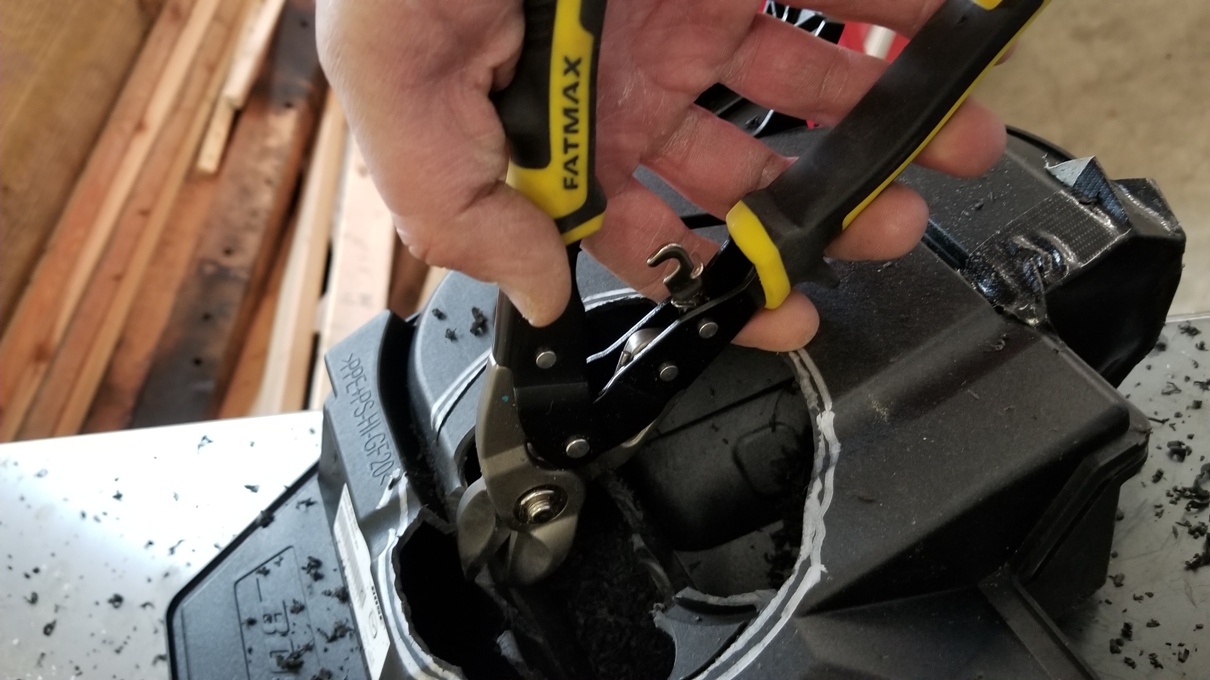
Quite a tall order here. Take a small, vented, footwell subwoofer and attempt to improve on its sound by getting rid of the muddy, boominess… Not to mention, we have another challenge of a low impedance to match. The factory driver is a 5.25″, 1 ohm unit. Yes, 1 ohm. Good luck finding anything close to 5.25″ in a true subwoofer at that impedance… The BOSE amplifier really boosts the frequencies below about 60Hz, which is great if all you want to hear is bass, but terrible if you enjoy a flatter, smoother response in the low range. That said, our ears like a bit of boost in the low range anyway, but not as much as the BOSE setup has built-in. We start by replacing the factory BOSE sub with a Peerless SLS-P830945 in the factory enclosure, and making some tests with that. As expected, the response smooths out slightly with the higher quality driver, but the 4 ohm impedance reduces the output a lot, and is further below the amount we hoped it would decrease… Even the upper bass range around 150Hz suffers, and the system sounds better with the factory sub back in place. While I had everything out of the footwell, I took some volume measurements of the plastic sub enclosure by displacing the volume in a bucket of water, doing some simple math, and I could then anticipate and design around some more accurate volume and port size dimensions. Finally, I ended up re-installing the Peerless in place of the BOSE sub, and fitted a SECOND identical Peerless sub into the same factory enclosure by doing some creative cutting and drilling, and converting it to a sealed enclosure by blocking the port. The enclosure’s volume is a tad on the small side for two of these subs, but not terribly so. We added poly-fil to the cavity and wired the Peerless subs in parallel, which resulted in a 2 ohm impedance, much closer to the 1 ohm BOSE sub. The results were just what I was after. MUCH cleaner bass, flat through the range and on par with the rest of the frequency response, except for that dreaded 250Hz dip… Between this sub mod and the tweeters, things are really improving overall. Paco Moto plans to offer the pieces and parts necessary to modify your BOSE sub enclosure exactly as I did. Beyond that, I have also designed a complete replacement for the footwell sub that I am currently prototyping. It will be a sealed design using a Dayton 8″ Ultimax subwoofer which has two separate 2 ohm voice coils, allowing for 1 ohm impedance when wired in parallel. This setup should be great for direct replacement while using the factory amp, or be ideal with a more intense system with replacement amps, as the Ultimax can handle 300 watts RMS.


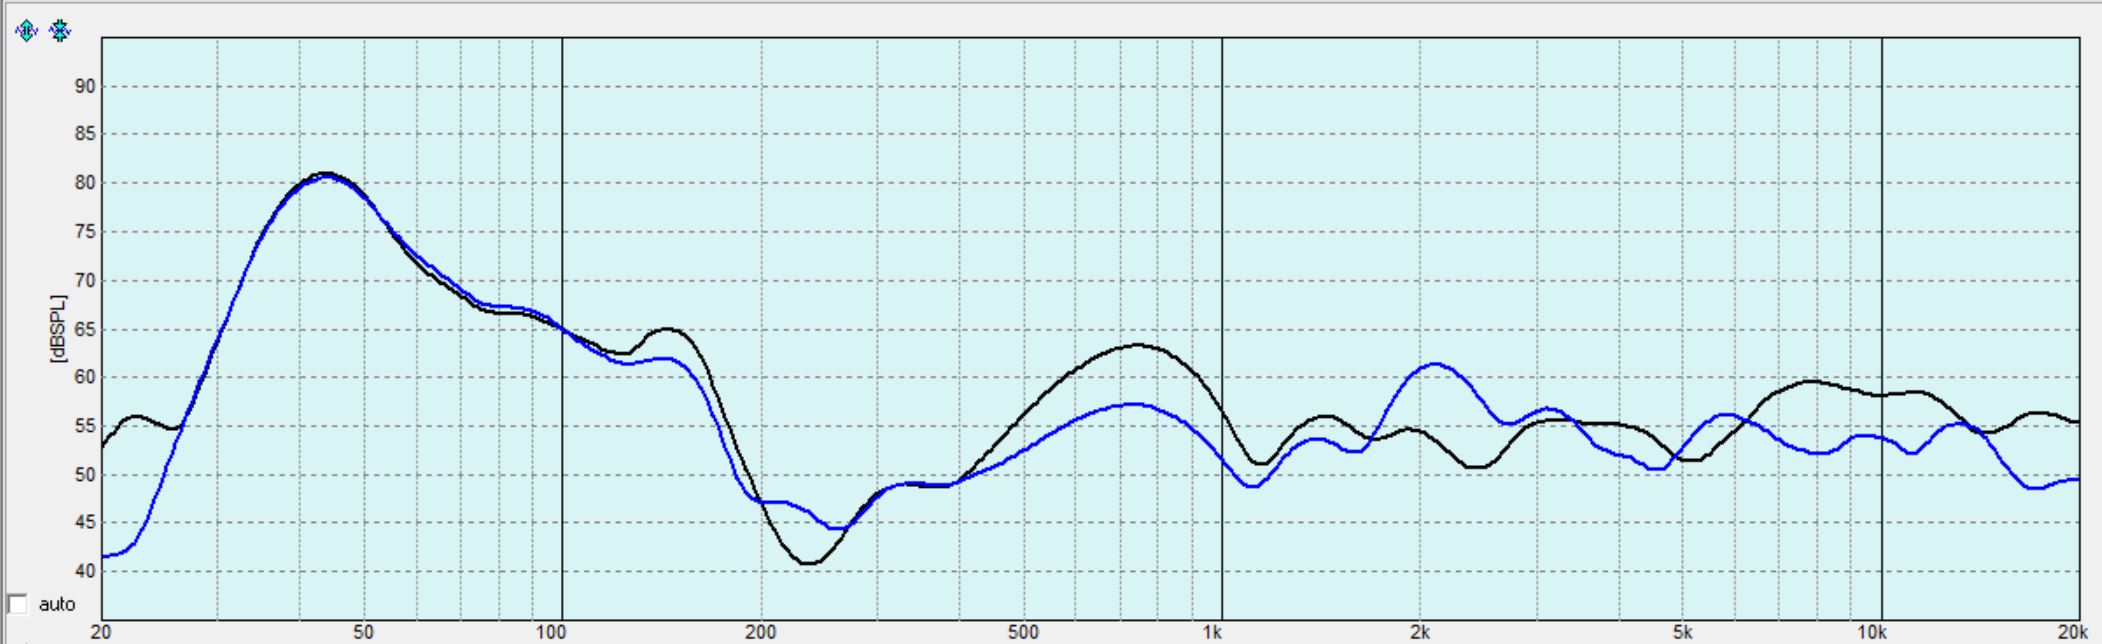
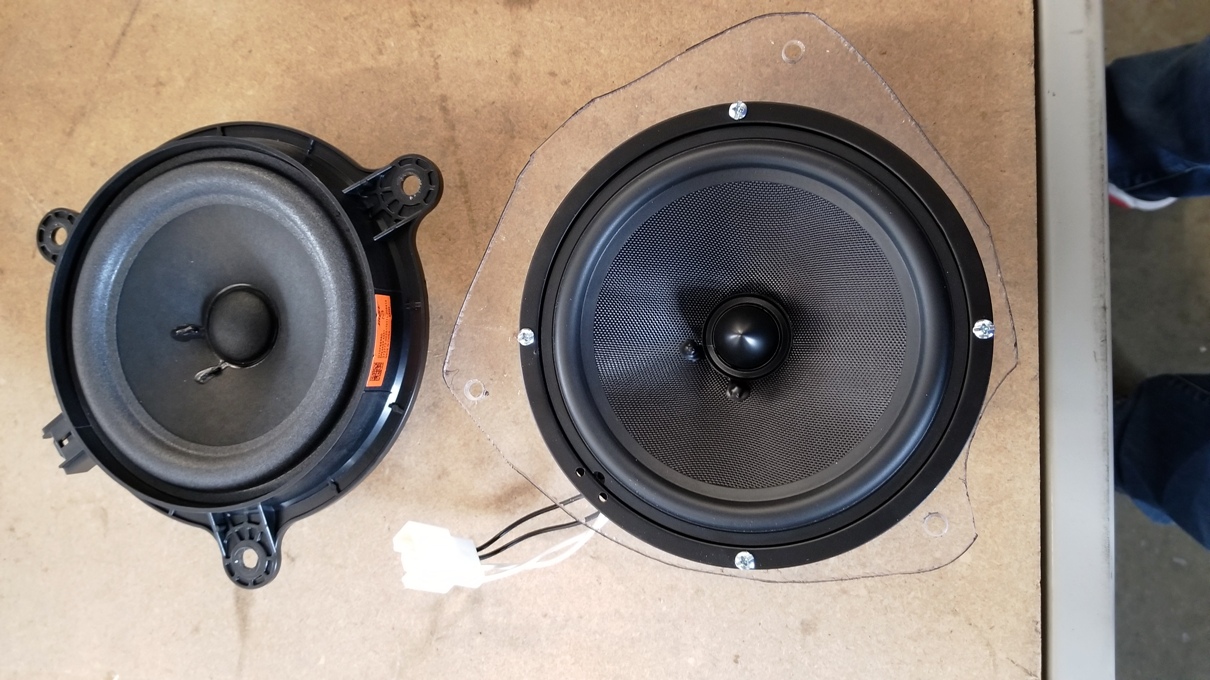
Door speakers replacement – Take 3
With the BOSE system and its factory set EQ, I’m fighting a bit of a tough battle. The factory setup was EQ’d to be weak in the 200-300Hz range, since the BOSE speaker has tendency to play louder in this range. Swap in a higher quality, more “flat” driver and now you have a big dip in that range, which is very difficult to fix while retaining the BOSE amp. My final step in making the door setup work as desired was to swap in a pair of high end 2 ohm speakers. I used CDT’s ES-6CV.2, 6.7″ woofer in 1/4″ Lexan plates again. I’m using the same plug-in harnesses on these to prevent any cutting of the factory harness. The improvement in sound quality is amazing. Easily the most significant modification so far, with the dual footwell subs a close second. The clarity and detail of every instrument is a huge difference over factory, and the mids are punchier, cleaner, and mesh well with the subs. They’re even brighten the upper midrange as well. The frequency response curve still shows BOSE’s wacky EQ setting hurting the 250Hz range, but there’s a small improvement there even so. Overall the results are ideal and the ONLY two things I would change are overall volume output of the entire system and the small amount of richness lost by that pesky lower midrange dip. A very balanced and impressive system to listen to, in terms of clarity and natural sound. Expect to see availability of these speakers and all associated hardware and necessary wiring (and tweeters and circuitry!) from Paco Moto in kit form early 2018.


–Damping the Door Panels–
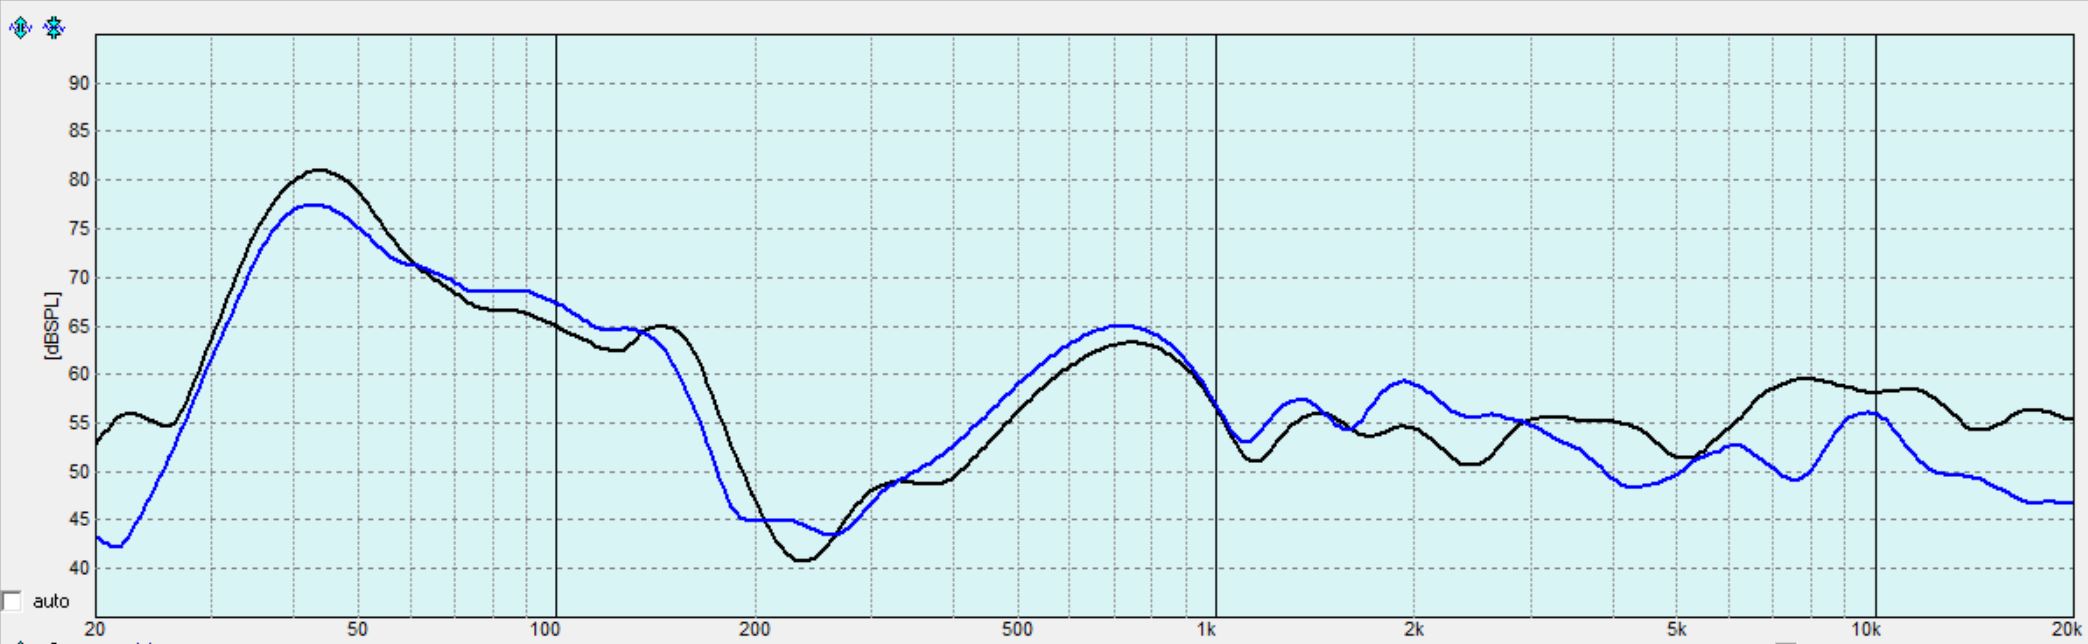
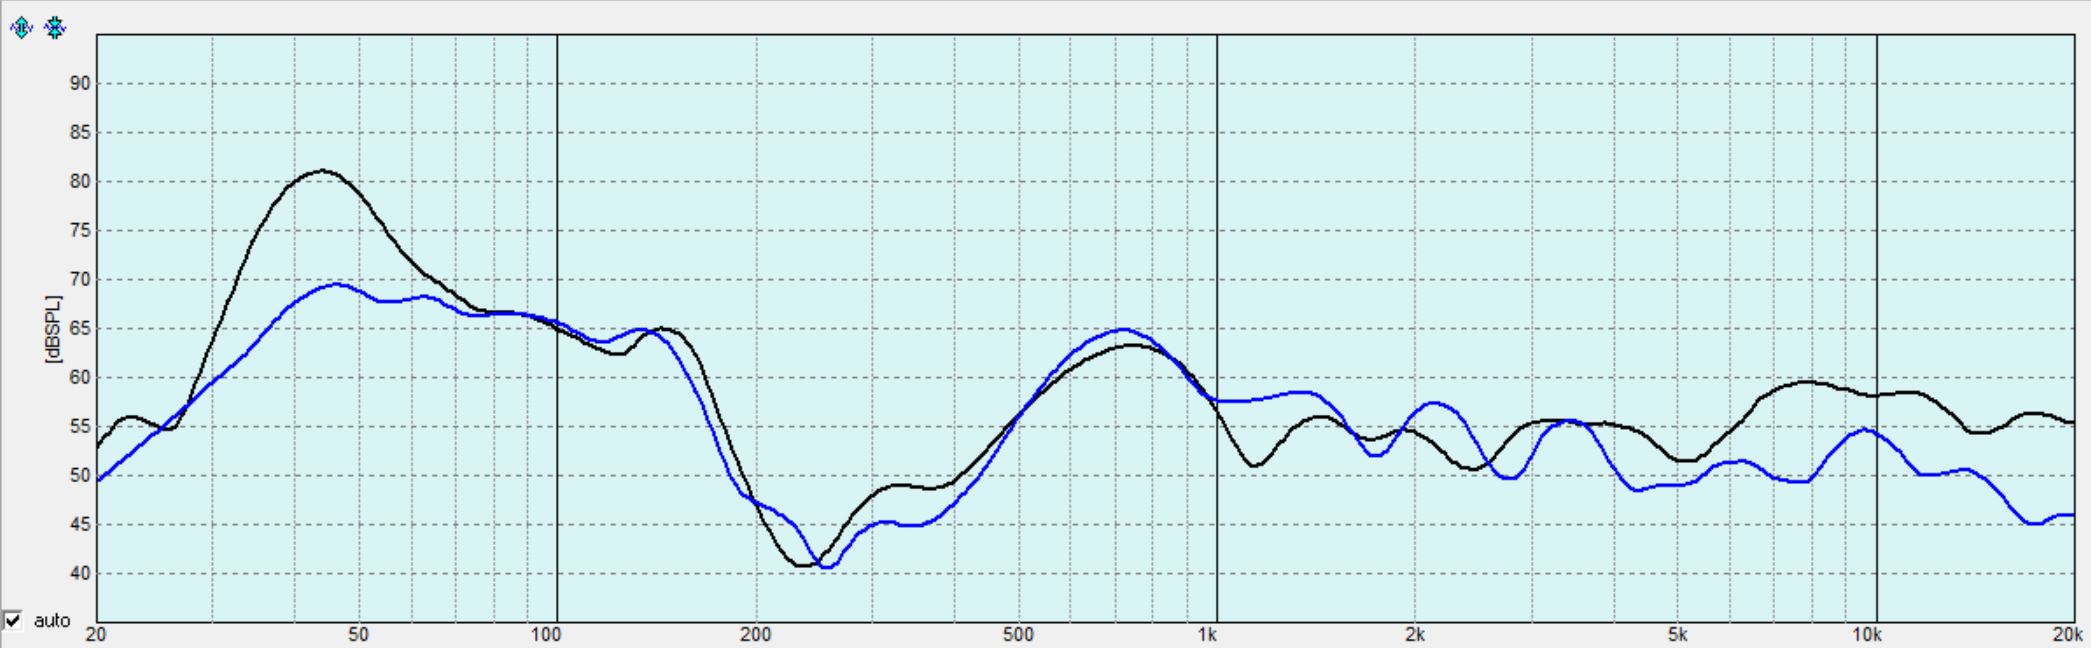
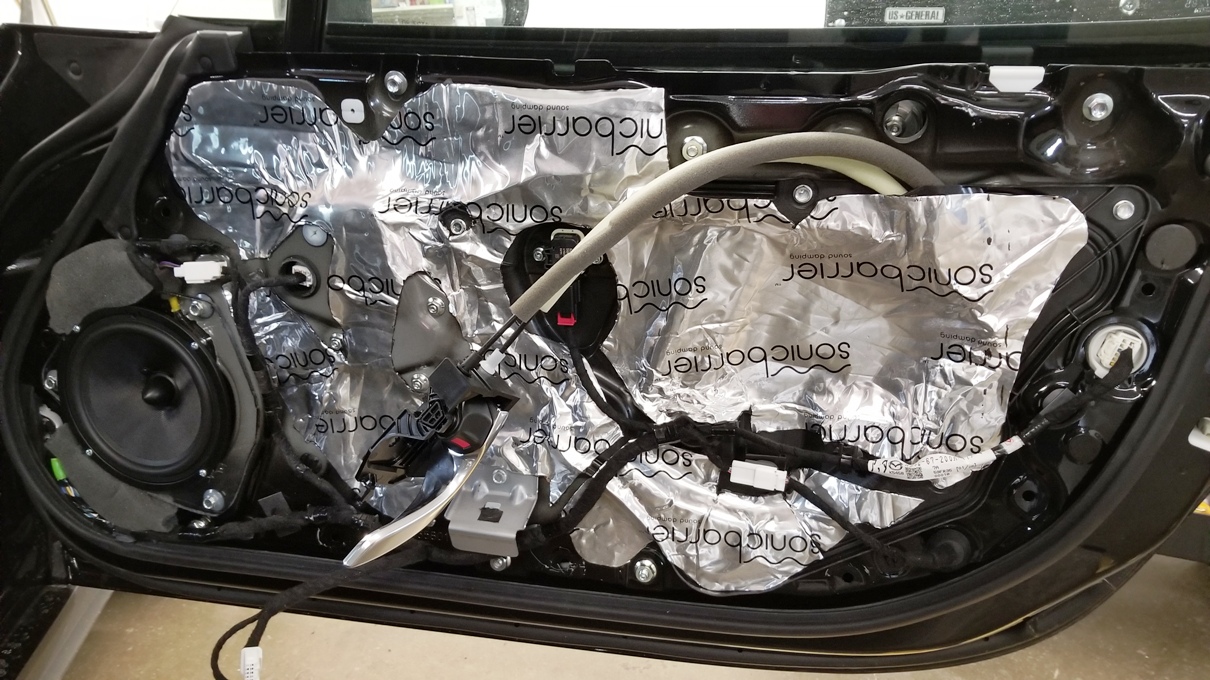
Applying sound damping material to the inside of a door panel always makes a a significant difference to sound quality, and is a very simple, inexpensive modification to do while you’re in there swapping speakers and such. The physics are simple. The thin sheet metal construction of an inner door panel wants to vibrate when sound energy from a mounted speaker is applied to it. It takes force to generate this vibration, so the speaker’s motor is wasting some of it’s energy just to make that happen, instead of applying more of that energy to move the speaker cone, which is key to output volume and clarity. Apply some self-adhesive mass to that panel, and it wants to vibrate less and at a lower frequency. You gain output AND minimize the “coloring” of the sound, as the now damped door panel wants to be less of a speaker itself. We will be offering pre-cut sound damping material with our upgrade kits, ready to install in minutes without all the fuss. Skeptical? How about a frequency response comparison? Before in black, after in blue… We gained a full 5dB in the low to mid-bass region! Also note how the midrange flattens out above 500Hz… That was most likely around the door panel’s natural resonance frequency! The proof is in the pudding!

–Summary–
Overall I’m very satisfied with the results of all the mods. The audio quality is a night and day difference over the factory setup, and listening is much more enjoyable! In a tiny Miata no less! I’m not quite done however, at least with this car… The next steps will be testing our 8″ footwell sub prototype, with and without auxiliary amp, inspecting, analyzing, and testing the factory amp, and working with some DSP tools to see if we can cure some of the EQ issues. For now, I’ll share a couple final comparison FR curves for your viewing enjoyment, to show where we are today versus where we started. Stay Tuned! — Mark


Interested in a similar setup for your ND Miata?
- Choosing a selection results in a full page refresh.
- Opens in a new window.